LBZ: ATI damper seems to small? Honing needed?

Dozerboy

Well-known member
Jun 23, 2009
4,806
383
83
TX of course
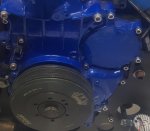
Well I tried to install my damper on my stock crank. I can’t even get to slip on more then 1/4” hitting it with a rubber mallet. Is that normal? I did through it in the oven at 200* and put anti seize on the crank. I didn’t try cooking the crank thinking it would make the anti seize to thick. I have the install tool, but damper wasn’t going square and started to bind.

I don’t have any experience trying to measure things this precise and my calipers only go to 0.000”and will round to 0.0005. I’m measuring my stock crank at 1.9255”. Also I don’t have a bore indicator, but best I can tell the inside dia of my damper is 1.924” at the face and 1.925 at the rear. Thats putting a lot of pressure and wiggling my calipers to get a max size. Thoughts?


Sent from my iPhone using Tapatalk
 

Dozerboy

Well-known member
Jun 23, 2009
4,806
383
83
TX of course
The hub was mounted to the damper when I got it. So I need to disassemble it to install it on the crank?

Is the install tool strong enough to put it all the way onto the crank or do I need to switch over to the balancer bolt at some point?

Sent from my SAMSUNG-SM-G900A using Tapatalk
 

DAVe3283

Heavy & Slow
Sep 3, 2009
3,678
235
63
Boise, ID, USA
I've been able to use the install tool to run it on most of the way, then used the balancer bolt once it has decent thread engagement. I've never heated the hub, but that would help.

The tight press fit is a big part of what stops it from spinning vs. the stock balancer, so it's worth fighting. Plus, you'll never need to take the hub off unless the front cover has to come off. You can do a water pump by just removing the outer part. Easier than a stock balancer for a water pump job, IMO.
 

Ne-max

I like turtles
Nov 15, 2011
3,361
64
48
Lincoln, Ne
Used the ati tool to press mine on. My last one I destroyed it taking it off but I did get 3 years out of it. As for water pump replace the stud and nut with a allan bolt. Then you dont have to mess with damper at all to do water pump.
 

kidturbo

Piston Tester
Jul 21, 2010
2,302
1,056
113
Somewhere On The Ohio
www.marinemods.us
Used the ati tool to press mine on. My last one I destroyed it taking it off but I did get 3 years out of it. As for water pump replace the stud and nut with a allan bolt. Then you dont have to mess with damper at all to do water pump.

No help on the ATI hubs, I used the install tool, but started em with a BFH.. Sorry thrust washers...

X2 on the Socket Head water pump bolt. Even if using a delete plate. I had an O-ring leaking just the other day.
 

Attachments

  • wp-bolt.jpg
    wp-bolt.jpg
    69.8 KB · Views: 82

Dozerboy

Well-known member
Jun 23, 2009
4,806
383
83
TX of course
Well I got it in a bind and messed up the hub. Only got it on 5/16" to 3/8". Do yoi think I can salvage it by grinding the burr down? Only $80 for a new one. Since I'm doing this in the truck I'm having hell trying to get it square. Probably should have tried to check it with an inspection mirror or something. Maybe I need to suck it up and pull the front clip off.

I borrowed a micrometer from a guy and I'm getting 1.9294"-1.9295" and 1.9288" at the end of the snout. Guess I don't need to push that hard on calipers they must flex a bit...lol


Sent from my SAMSUNG-SM-G900A using Tapatalk
 
Last edited:

Dozerboy

Well-known member
Jun 23, 2009
4,806
383
83
TX of course
How hard is it to pull that stud out for the water pump with the pump on? Think I need to double nut it or use a female torx? Any idea the tread size need for the Allen bolt?

Sent from my SAMSUNG-SM-G900A using Tapatalk
 

Chevy1925

don't know sh!t about IFS
Staff member
Oct 21, 2009
21,105
4,836
113
Phoenix Az
Iirc a 6mm 6 point socket will fit the torx well enough to take it out. I use it all the time for tearing down and installing them.
 

TheBac

Why do I keep doing this?
Staff member
Apr 19, 2008
15,299
1,594
113
Mid Michigan
Um, not to be a douchebag, but didnt I once hear of people putting those hubs in the oven for a bit before installing them? Granted, you'd have to go from oven to truck very quickly...but it seems to me that it would work.
 

Dozerboy

Well-known member
Jun 23, 2009
4,806
383
83
TX of course
Um, not to be a douchebag, but didnt I once hear of people putting those hubs in the oven for a bit before installing them? Granted, you'd have to go from oven to truck very quickly...but it seems to me that it would work.


Ya I did at 200* probably should of done more and maybe cooled the crank so with some canned air. Not sure it mattered since apparently I can but the damn thing on straight. Probably go on easy then... lol


Sent from my iPhone using Tapatalk
 

Dozerboy

Well-known member
Jun 23, 2009
4,806
383
83
TX of course
Grind the burr out of it, toss in the oven at 450F for an hour. Bet it goes then..

Think I did my ring gears at 420F or about and they dropped right on the flywheels. But act fast cause they shrink quick.


Thanks


Sent from my iPhone using Tapatalk
 

JoshH

Daggum farm truck
Staff member
Vendor/Sponsor
Feb 14, 2007
13,587
605
113
Texas!!!
I've never had a problem just slipping the balancer on as far as I can get it by hand before using the tool to install it the rest of the way. With the tool threaded all the way into the crank and the big washer, it should align the balancer for you as it presses it on. I'm wondering if you got it crooked trying to knock it on with the hammer.
 

Dozerboy

Well-known member
Jun 23, 2009
4,806
383
83
TX of course
I've never had a problem just slipping the balancer on as far as I can get it by hand before using the tool to install it the rest of the way. With the tool threaded all the way into the crank and the big washer, it should align the balancer for you as it presses it on. I'm wondering if you got it crooked trying to knock it on with the hammer.


That’s a good point.

Then I read the instructions it said the 3 bolts where just to keep the tool from spinning so I just put them in hand tight. Well when I went to pull the damper it was obvious it wasn’t square. If I had tighten them down it might have helped.


I called ATI there dampers leave at 1.9273” for the DMAX. They have the stock crank at 1.9280”. Either I suck at measuring or the micrometer I borrowed was way off.


Sent from my iPhone using Tapatalk
 
Last edited:

kidturbo

Piston Tester
Jul 21, 2010
2,302
1,056
113
Somewhere On The Ohio
www.marinemods.us
As Josh expressed, I've personally never had any issues with the ATI hubs being too tight on stock or Callies cranks.

However the two early run FD units I installed pictured above, took one guy on the GM install tool, another doing some around the hub hammer action to keep it straight. And several thoughts of, "Is this SB is gonna go on or not.." Of course ya can't bake those fluid filled dampers...
 

JoshH

Daggum farm truck
Staff member
Vendor/Sponsor
Feb 14, 2007
13,587
605
113
Texas!!!
You shouldn't need to use any bolts for installation other than the long threaded stud and adapter to convert it to the factory crank bolt thread size and pitch. The 3 bolts are only needed to pull it. What sort of installation tool are you using?
 

Dozerboy

Well-known member
Jun 23, 2009
4,806
383
83
TX of course
ATIs install tool. Using the 3 bolts is in there instructions.
9ef7adc12605bbb492fa4c2c2e2d81f1.jpg


Sent from my iPhone using Tapatalk
 

JoshH

Daggum farm truck
Staff member
Vendor/Sponsor
Feb 14, 2007
13,587
605
113
Texas!!!
That's different than mine, but I bought it 12 years ago from SoCal.
 

Harbin_22

Active member
Dec 4, 2010
3,858
7
38
Southern Indiana
I had my machine shop take a few thousands out of my hub lol. Was tired of fighting with it. Takes a little pressure to take it on and off now, but with a keyed crank, not worried about being such a tight fit